Crocheting a vintage granny square is a fantastic way to get started with crochet, as it combines simple techniques and produces beautiful results. The vintage granny square pattern has a timeless appeal, featuring a combination of classic stitch techniques and a bold, colorful design. It’s a versatile piece that can be used in blankets, cushions, scarves, and so much more. To begin, you’ll need yarn in your chosen colors, a crochet hook that matches your yarn weight, and a yarn needle for weaving in ends. This square typically starts in the center and builds outward, making it ideal for experimenting with color combinations.
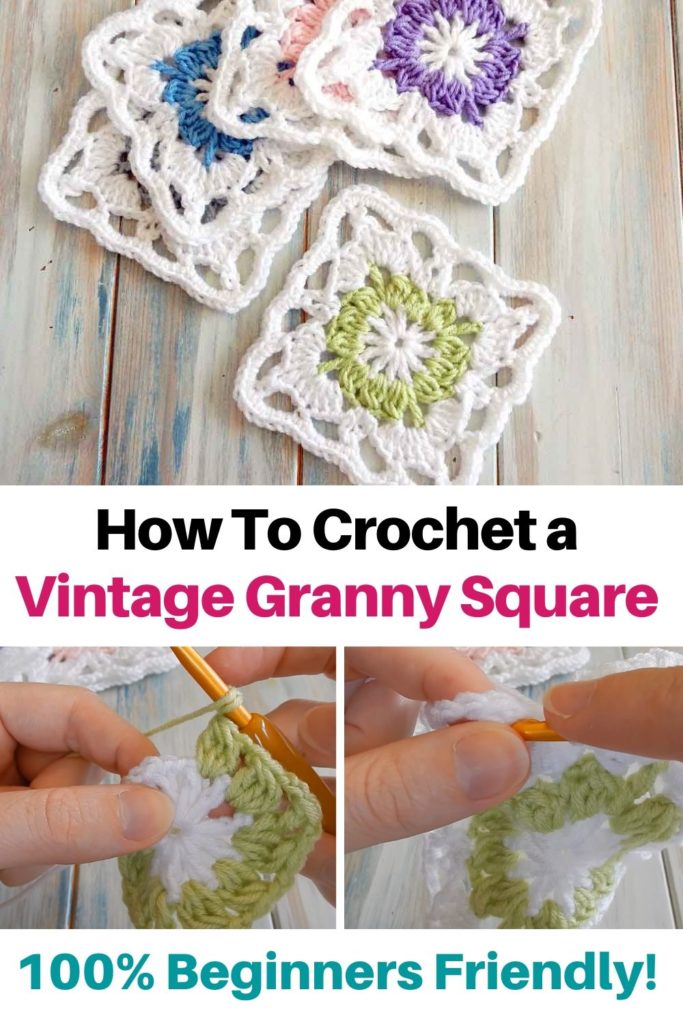
To begin your vintage granny square, make a slip knot and chain 4, then join with a slip stitch to form a ring. Chain 3 (this counts as your first double crochet), then work 2 double crochets into the ring. Chain 2 to create a corner, then work another set of 3 double crochets into the ring. Repeat this two more times, chaining 2 between each cluster. At the end of the round, join with a slip stitch to the top of your beginning chain-3. You should now have four clusters of 3 double crochets with chain-2 spaces at each corner, forming the base of your square.
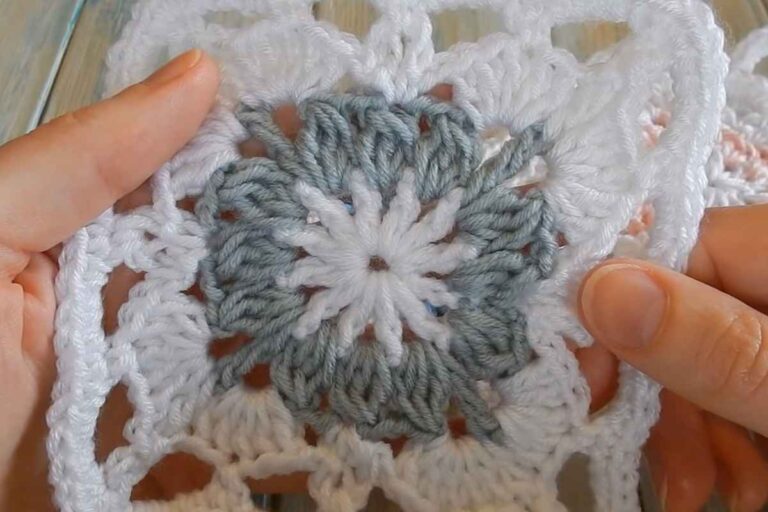
For each new round, you’ll join a new color (if desired) in any corner space. Chain 3, then work 2 more double crochets into the same space, chain 2, and work 3 more double crochets to complete the corner. Continue working 3 double crochets into each side space and 3 double crochets, chain 2, 3 double crochets into each corner space. As the square grows, the number of side clusters will increase. After completing your desired number of rounds, fasten off and weave in all ends with a yarn needle. The finished square can be blocked for a more polished look and joined with others to create larger projects like throws, bags, or clothing.
credit toHappyBerry Crochet