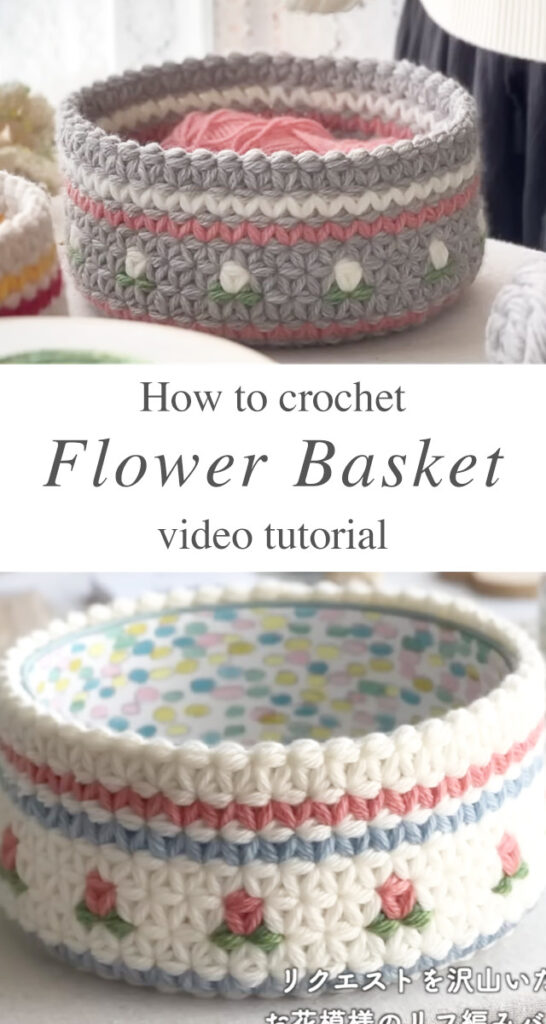
Making a flower crochet basket is a lovely way to combine function with beauty. Whether you’re storing yarn, holding small household items, or using it as a decorative piece, this project adds a handmade charm to any room. In this step-by-step guide, we’ll walk you through how to create a sturdy, floral-inspired basket from the base to the blooming details on the sides.
To get started, choose a strong, structured yarn like cotton or t-shirt yarn—it’ll help your basket hold its shape. You’ll also need a hook that’s slightly smaller than recommended for the yarn to create tight stitches, giving the basket stability. Begin by crocheting a flat circle for the base using single crochet stitches, increasing evenly to keep it smooth and round. Once the base is the size you want, you’ll stop increasing and start working up the sides.
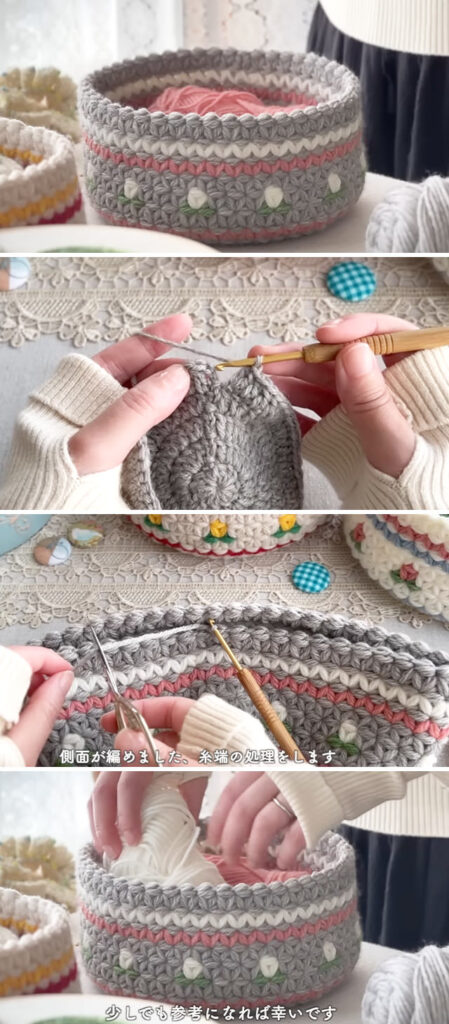
As you build the sides of the basket, you can either stick with simple stitches or get creative with texture. To add flower details, you can crochet individual flower motifs and sew them onto the outside, or you can work puff stitches or popcorn stitches directly into the basket to form a floral pattern. These little details really bring your piece to life and make it one-of-a-kind.
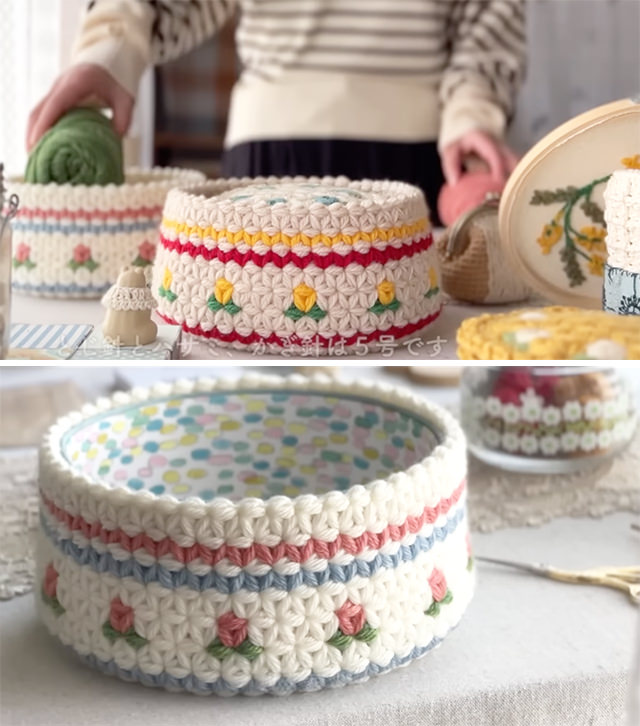
To finish your basket, add a round or two of slip stitches to firm up the edge, and consider crocheting handles for easy carrying. We’ll also guide you through weaving in your ends securely and shaping your basket so it stands up nicely. Whether you’re making it for yourself or as a thoughtful gift, your flower crochet basket will be a beautiful, practical piece filled with personality.
Tutorial and photos of this flower crochet basket by: MimosdaMalu.