In this video, you’ll learn how to knit a versatile and elegant border that works beautifully with dresses of all styles—whether they’re flowy, fitted, casual, or formal. A well-crafted knitted border adds that perfect finishing touch, giving your dress a polished, handmade look while helping to prevent curling edges or stretched hems. This technique is easy to learn and can be adapted for any dress pattern or construction style.
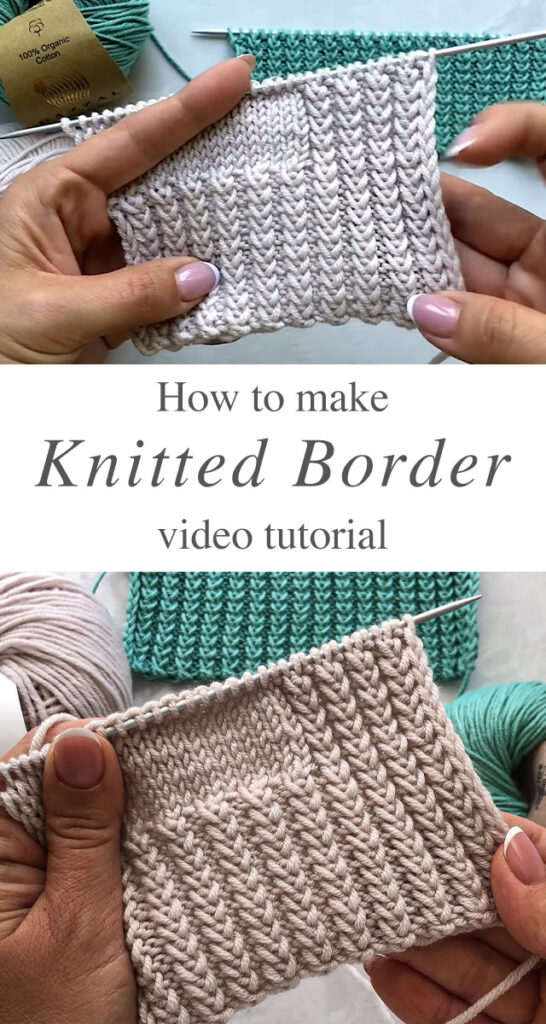
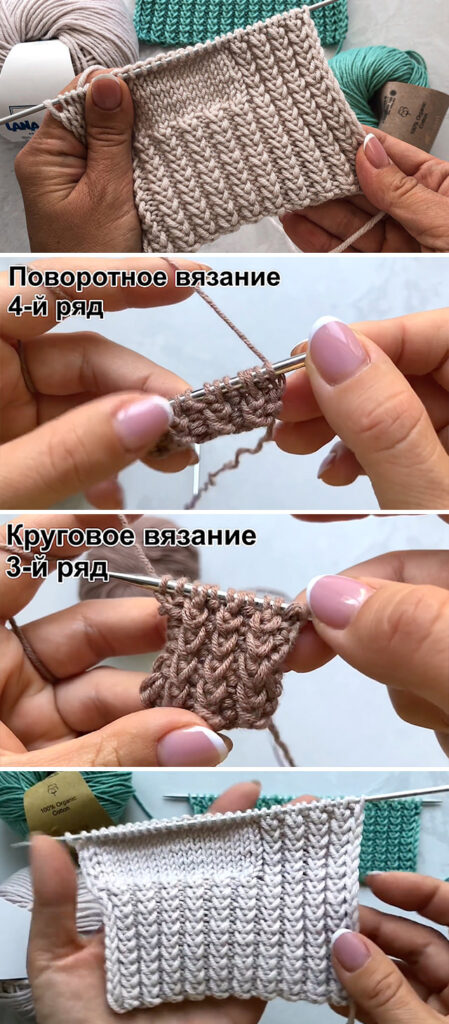
We’ll walk you through the step-by-step process of creating the border, from picking up stitches along the edge to knitting the repeating pattern. Using a simple combination of knits and purls—or adding a decorative touch like picot or lace—you’ll be able to enhance the look of any dress without overwhelming the design. This border works great for hems, sleeves, necklines, or even as a waist detail to add structure and style.
What makes this knitted border truly special is its flexibility. It can be made narrow for a subtle finish or wider to add a statement edge, depending on the look you’re going for. We’ll also share tips on how to match the stitch pattern with your dress fabric and how to adjust it for different yarn weights and dress shapes—so whether your project is knit in cotton, wool, or blends, this border will fit right in.
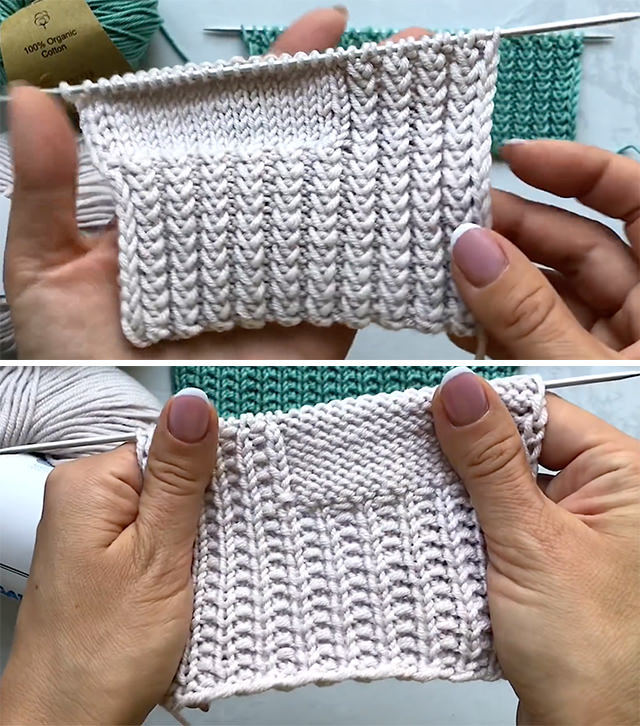
By the end of the video, you’ll be ready to add this simple but stunning knitted border to any dress project you’re working on. It’s a quick way to elevate your handmade garments and make them look even more professional and customized. Once you see how easy and effective it is, you might just want to use it on every project going forward!
Tutorial and photos of this border by: LaNa / Стильное вязание.